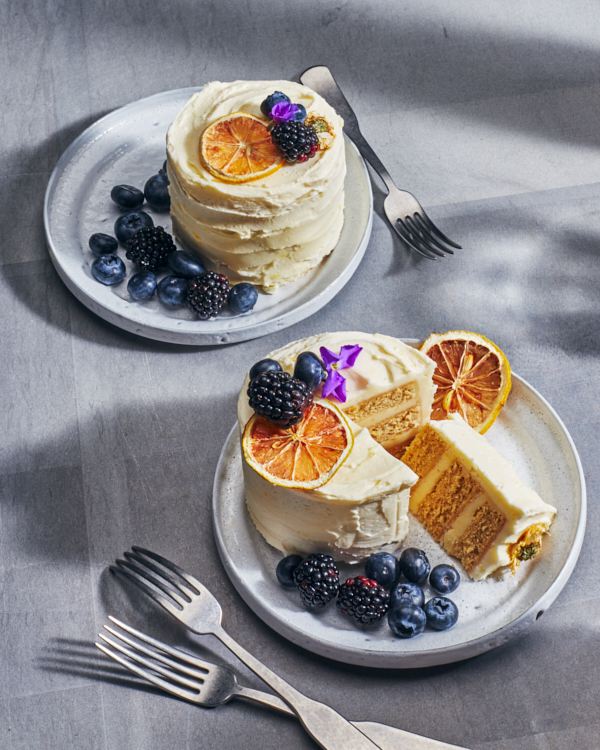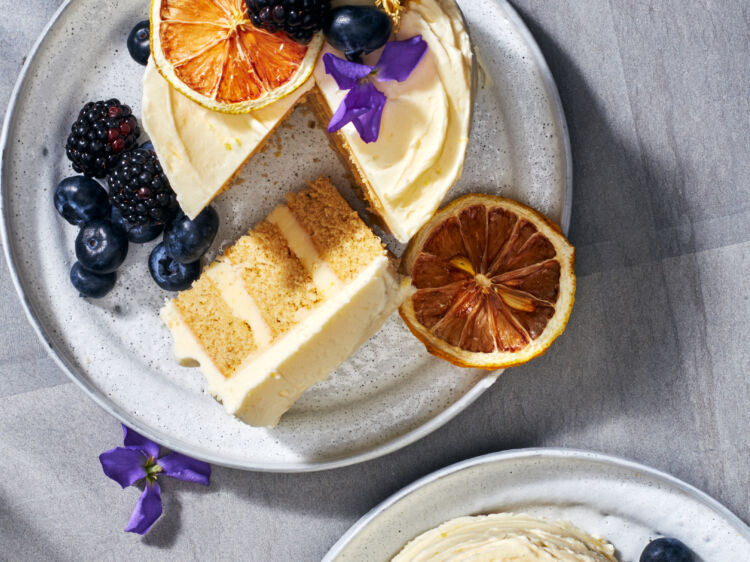
Mini Lemon Chamomile Cakes
Back to Recipes & MoreIngredients
- ¾ cup (188 ml) milk
- 4 (10 g) chamomile tea bags, divided
- 2½ cups (280 g) cake flour
- ¾ tsp (4 g) baking powder
- ½ tsp (2 g) baking soda
- ½ tsp (3 g) salt
- ¼ cup (63 ml / 65 g) plain yogurt
- 2 eggs, lightly beaten
- 2 tsp (10 ml) pure vanilla extract
- 1 cup + 2 tbsp (244 g) Redpath® Golden Yellow Sugar, packed
- ¾ cup (170 g) butter, cubed
- Double the recipe “Quick Buttercream”
- ¼ cup (63 ml) lemon juice, preferably freshly squeezed
- 2 tbsp (12 g) lemon zest, finely grated
- 1 tsp (6 g) salt
- Lemon slices
- Lemon zest
- Fresh or dried chamomile flowers (food grade/pesticide-free)
Equipment
Half baking sheet (18 x 13 inch)
Parchment paper
Liquid measuring cup
Measuring spoons
Small heavy-bottomed saucepan (with lid)
Spoon
Scale OR dry measuring cups
Medium bowl
Whisk
Small bowl
Stand mixer fitted with paddle attachment OR large bowl with hand mixer
Rubber spatula
Large offset spatula
Wire cooling rack
Round cookie cutter (3 inch)
Small offset spatula x 2
Cake board(s) OR plate(s) OR cake stand(s)
Piping bag
Plain round tip (¼- to ½-inch opening)


Instructions
Step 1
Preheat oven to 350°F (177°C). Lightly grease the bottom and sides of a half baking sheet (18 x 13 inch) and line with parchment paper.
Step 2
Add milk to a small heavy-bottomed saucepan. Place over medium heat and warm until it barely begins to simmer. Remove from heat. Add in two of the chamomile tea bags, cover, and steep; 10 minutes. Gently press the tea bags with the back of a spoon to extract as much flavour from the tea as possible. Discard tea bags. Set aside to cool to room temperature.
Step 3
In a medium bowl, whisk together the cake flour, baking powder, baking soda, and salt until well combined. Open the remaining tea bags and add the contents into the dry ingredients. Whisk well to distribute the tea evenly.
Step 4
In a small bowl, whisk together yogurt, lightly beaten eggs, and pure vanilla extract until smooth.
Step 5
In the bowl of a stand mixer fitted with the paddle attachment, combine the Redpath® Golden Yellow Sugar and cubed butter. Cream on medium speed until pale in colour and creamy; about 3 minutes.
Step 6
Add in the dry ingredients and infused milk (room temperature), and mix on low speed until just combined. Increase speed to medium and mix until well combined; 2 minutes.
Step 7
On low speed, add in a third of the yogurt mixture. Increase speed to medium and blend well until the yogurt mixture is fully incorporated into the batter. Repeat process with the remaining yogurt mixture.
Step 8
Transfer the batter into the prepared baking sheet. With a large offset spatula, evenly spread the batter to the edges of the pan. Run a thumb around the edge of the baking sheet and the batter to check the depth and evenness of the batter and prevent cake from sticking to the edges.
Step 9
Place cake into the preheated oven. Bake for 15 to 20 minutes, or until the cake springs back when gently pressed. Place cake onto a wire cool rack to cool completely in the pan; 2 hours.
Step 10
Once cake is completely cooled, use a 3-inch round cutter to cut out as many rounds from the sheet as possible. Each mini cake will have 3 layers. Use a small offset spatula to remove excess cake from around the rounds (see Chef’s Tips).
Step 1
Make as directed in the recipe “Quick Buttercream.” Beat in the lemon juice, lemon zest, and salt when instructions mention adding the vanilla. If buttercream is too thin, add an additional ½ cup (60 grams) of Redpath® Icing Sugar. If buttercream is too stiff, beat in another tablespoon of heavy cream.
Refer to “Frosting a Cake” for visuals.
Step 1
Place a completely cooled cake layer onto a cake board, plate, or desired stand.
Step 2
Transfer some of the buttercream into a piping bag fitted with a plain round tip. Pipe a single layer (concentric circles) onto the cake layer. If desired, use a small offset spatula to smooth the buttercream. Place another cake layer on top of the buttercream, gently pressing down to adhere. Repeat process.
Step 3
If making “naked” cakes, pipe a final layer of buttercream on the top of the third cake layer, and smooth the top of the buttercream with the offset spatula.
Step 4
For fully covered cakes: Pipe a small amount of buttercream on the top and sides of the 3-layered cakes. With the offset spatula, spread a thin layer of buttercream over the top and sides of the cakes sealing the crumbs onto the cake. This is called a crumb coat.
Step 5
Place the cakes into the fridge to chill; 15 minutes.
Step 6
Remove cakes from the fridge (one at a time), and pipe a small amount of buttercream (refer to “Frosting a Cake”) on the top and sides of the cake for the final coat. Using the offset spatula, evenly smooth the buttercream over the top and sides of the cakes.
Step 7
Decorate cakes with lemon slices, lemon zest, and/or fresh or dried chamomile flowers.
Step 8
Store any leftovers in an airtight container (see Chef’s Tips).