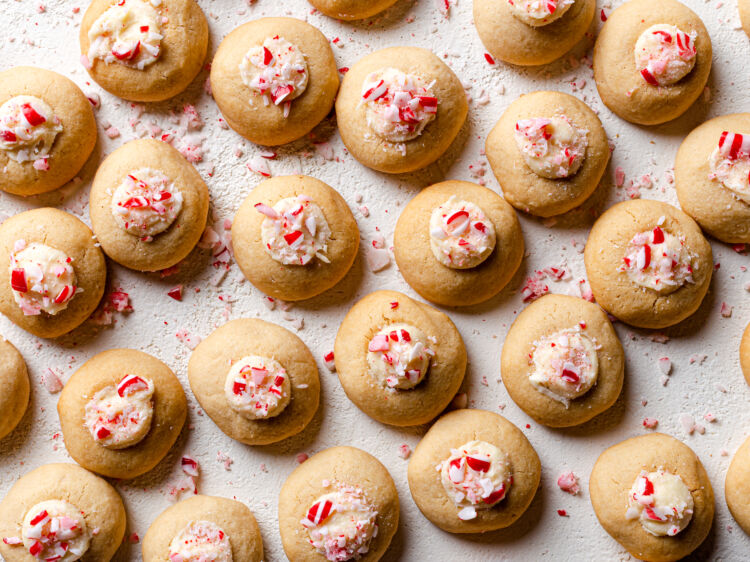
Peppermint Thumbprint Cookies
Back to Recipes & MoreIngredients
- 2⅔ cups (298 g) cake flour
- ½ tsp (3 g) salt
- 1 cup + 2 tbsp (255 g) butter
- ½ cup + 2 tbsp (136 g) Redpath® Golden Yellow Sugar, packed
- 1 egg yolk
- 1½ tsp (7 ml) pure vanilla extract
- 1¼ tsp (6 ml) pure peppermint extract
- 1⅓ cup (227 g) white chocolate, finely chopped
- ⅓ cup (83 ml) heavy cream
- ¼ tsp (2 g) salt
- 1¼ tsp (6 ml) pure peppermint extract
- ¼ tsp (2 ml) pure vanilla extract
- 2 tbsp (28 g) butter, pieces
- Candy canes or peppermint candies, finely crushed
Equipment
Large baking sheet
Parchment paper
Scale OR dry measuring cups
Measuring spoons
Liquid measuring cup
Medium bowl
Whisk x 2
Stand mixer with paddle attachment OR large bowl with handheld mixer
Rubber spatula
Wooden spoon
Wire cooling rack
Medium heatproof bowl
Small heavy-bottomed pot
Heatproof spatula
Plastic wrap OR parchment paper
Piping bag
Small round piping tip

Instructions
Step 1
Line a large baking sheet with parchment paper. Set aside.
Step 2
In a bowl, whisk together the cake flour and salt until no lumps remain.
Step 3
In the bowl of a stand mixer fitted with the paddle attachment, cream butter and the Redpath® Golden Yellow Sugar on medium speed until pale in colour; 2 minutes.
Step 4
Add in the egg yolk, pure vanilla extract, and peppermint extract. Blend until fully incorporated into the butter mixture.
Step 5
Add in half of the dry ingredients. Mix on low speed until just combined. Repeat with the remaining dry ingredients. Mix on low speed until dough is no longer crumbly and holds together; do not overmix.
Step 6
Using a 1 tbsp measuring spoon, scoop 1-inch balls (or around 15 grams) onto the prepared baking sheet. Roll each ball in the palm of your hand until smooth and roughly spherical. Space cookies about 2 inches apart on the baking sheet. With the handle of a wooden spoon dipped into a small dish of water (this prevents the handle from sticking to the dough), make an indentation into each ball (about ½-inch deep and wide).
Step 7
Place baking sheet into the fridge to chill; at least 30 minutes. Preheat the oven to 375°F (191°C).
Step 8
Place the chilled cookies into the preheated oven. Bake for 10 to 12 minutes or until bottoms and edges are golden in colour. Tops should still be relatively pale.
Step 9
Allow to slightly cool on the pan before transferring to a wire cooling rack to cool completely.
Step 1
Place the finely chopped white chocolate into a heatproof bowl. In a small pot, over medium heat, bring heavy cream and salt just to a simmer. Remove from heat and stir in the peppermint extract, and vanilla extract.
Step 2
Add in half of the cream to the white chocolate. Let sit for 2 minutes to melt the chocolate. With a rubber spatula, slowly stir the cream from the centre out until smooth. Gradually add and stir in the rest of the heavy cream into the white chocolate mixture. (See Chef’s Tips if white chocolate does not fully melt.)
Step 3
Add in the butter pieces. Stir until fully incorporated and mixture is glossy. Stir until ganache is slightly cooled. Place a piece of plastic wrap or parchment onto the surface of the ganache. Place into the fridge to chill completely and mixture has thickened; 30 minutes.
Step 4
Whisk the cooled ganache filling until mixture is smooth, and a pale, creamy white colour. Transfer the peppermint ganache into a piping bag fitted with a small round tip. Pipe a small amount of the filling into the indentations of the completely cooled cookies. Sprinkle ganache with crushed candy canes, if desired. Let ganache cool completely to set.
Cookies can be kept in an airtight container in the refrigerator for up to a week.